Bringing Home Baby Without Breaking Your Body – How to protect your joints when you have arthritis and a new baby
Despite infants’ diminutive size and stature, caring for a new baby is a very physical job!

Many new parents and caregivers experience joint or muscle pain after repetitive stress caused by lifting, carrying, diapering, and holding their baby. It’s estimated that between 25-50% of new parents experience DeQuervain’s tenosynovitis (or “Mommy thumb”) alone. It is also common to have pain in other areas such as the wrists, shoulders and back. These issues are of course exacerbated by chronic underlying illnesses such as autoimmune arthritis.
From my experiences as a new mom with rheumatoid arthritis and from my training as an occupational therapist, I would like to share tips on my favorite baby items and strategies that can help preserve the caregivers’ joints and muscles*. I will highlight general “joint protection strategies” in orange as we go along.
This comprehensive guide to joint protection strategies for persons with arthritis has particularly helpful pictures to illustrate the safest way to perform daily activities. I strongly recommend you also read the following articles, which provide a nice overview of proper body mechanics to prevent pain and strain from bringing home baby. For my up to date life hacks, check out my newest project Arthritis Life where I post video life hacks and more!
Baby Clothes & Swaddles

If you’re anything like me, you’ve probably oohed and aahed over your fair share of baby clothes. They are so irresistible, from the little overalls to the teeny tiny socks to the baby animals stitched into every corner! If baby clothes were as easy to put on and off as they are cute, the 12-14 diaper changes a day during the first couple months would be a heck of a lot easier. Unfortunately, baby clothes often come with a mind boggling assortment of small closures, which can be difficult for those with joint pain (especially as the baby gets older and squirmier during changing time!). The most important clothing considerations for me have been:
- Resistance: How stretchy is the material? Clothing items with stretchy neck and arm, leg and waist openings are much easier to manipulate and get onto your child without causing excessive strain on your joints.
- Tightness of fit: It is easier on my joints to dress Charlie in clothes that are slightly loose rather than tight. Take care, however to stick to outfits that are snug around the upper body and neck to avoid a smothering hazard while they sleep.
- Closures: How is the clothing item closed – does it require zippers, snaps, velcro, buttons or something else? I prefer zippers and velcro as they require much less stress on my thumb and finger joints. They are also quicker to take on and off than snaps or buttons. For the uninitiated: most clothing items have either zippers, snaps or buttons, most bibs have either snaps or velcro, and swaddles tend to have either zippers, velcro or snaps. Please see the chart below for my opinion of the relative ease of different closures.
|
ZIPPERS |
SNAPS |
VELCRO |
BUTTONS |
|
|
Easy on the finger/thumb joints? |
YES |
NO |
YES |
NO |
|
Quick to take on/off |
YES |
NO |
YES |
NO |
|
Keep baby’s top warm while you change diaper |
NO |
YES |
IT DEPENDS |
IT DEPENDS |

The main reason snaps are harder than zippers/velcro is that the action required to fully “snap” them together requires direct force to the thumb and finger joints, whereas with zippers/velcro you are holding the material in a static position and using your larger joints/muscles to create the motion required to secure them. So, the recommendation for using velcro/zippers over snaps falls under the joint protection strategy of “always use bigger/more joints when possible rather than requiring your tiny hand joints to absorb the main force of an action.”
I recommend that if you have outfits with snaps, consider just snapping the middle of the 3 snaps to save some stress on your joints. Additionally, not all snaps are created equal; some are easier to snap and unsnap than others, so test them out before selecting clothes for your little one. I completely avoid items with buttons with the exception of special occasion clothing, since they can be so cumbersome to secure.
The only downside to zippers is that they tend to expose the baby’s trunk during a diaper change, since most zippers start at the top. In this case, I recommend you simply put a blanket on their tummy to help them maintain a cozy body temperature as you change them.
- Swaddles: The ones with zippers or velcro (such as Summer Infant SwaddleMe, Halo Sleep Sack or the Woombie) are the easiest for me to close and open. As with other clothing items, consider the stretchiness of the material as you select a swaddle.
-
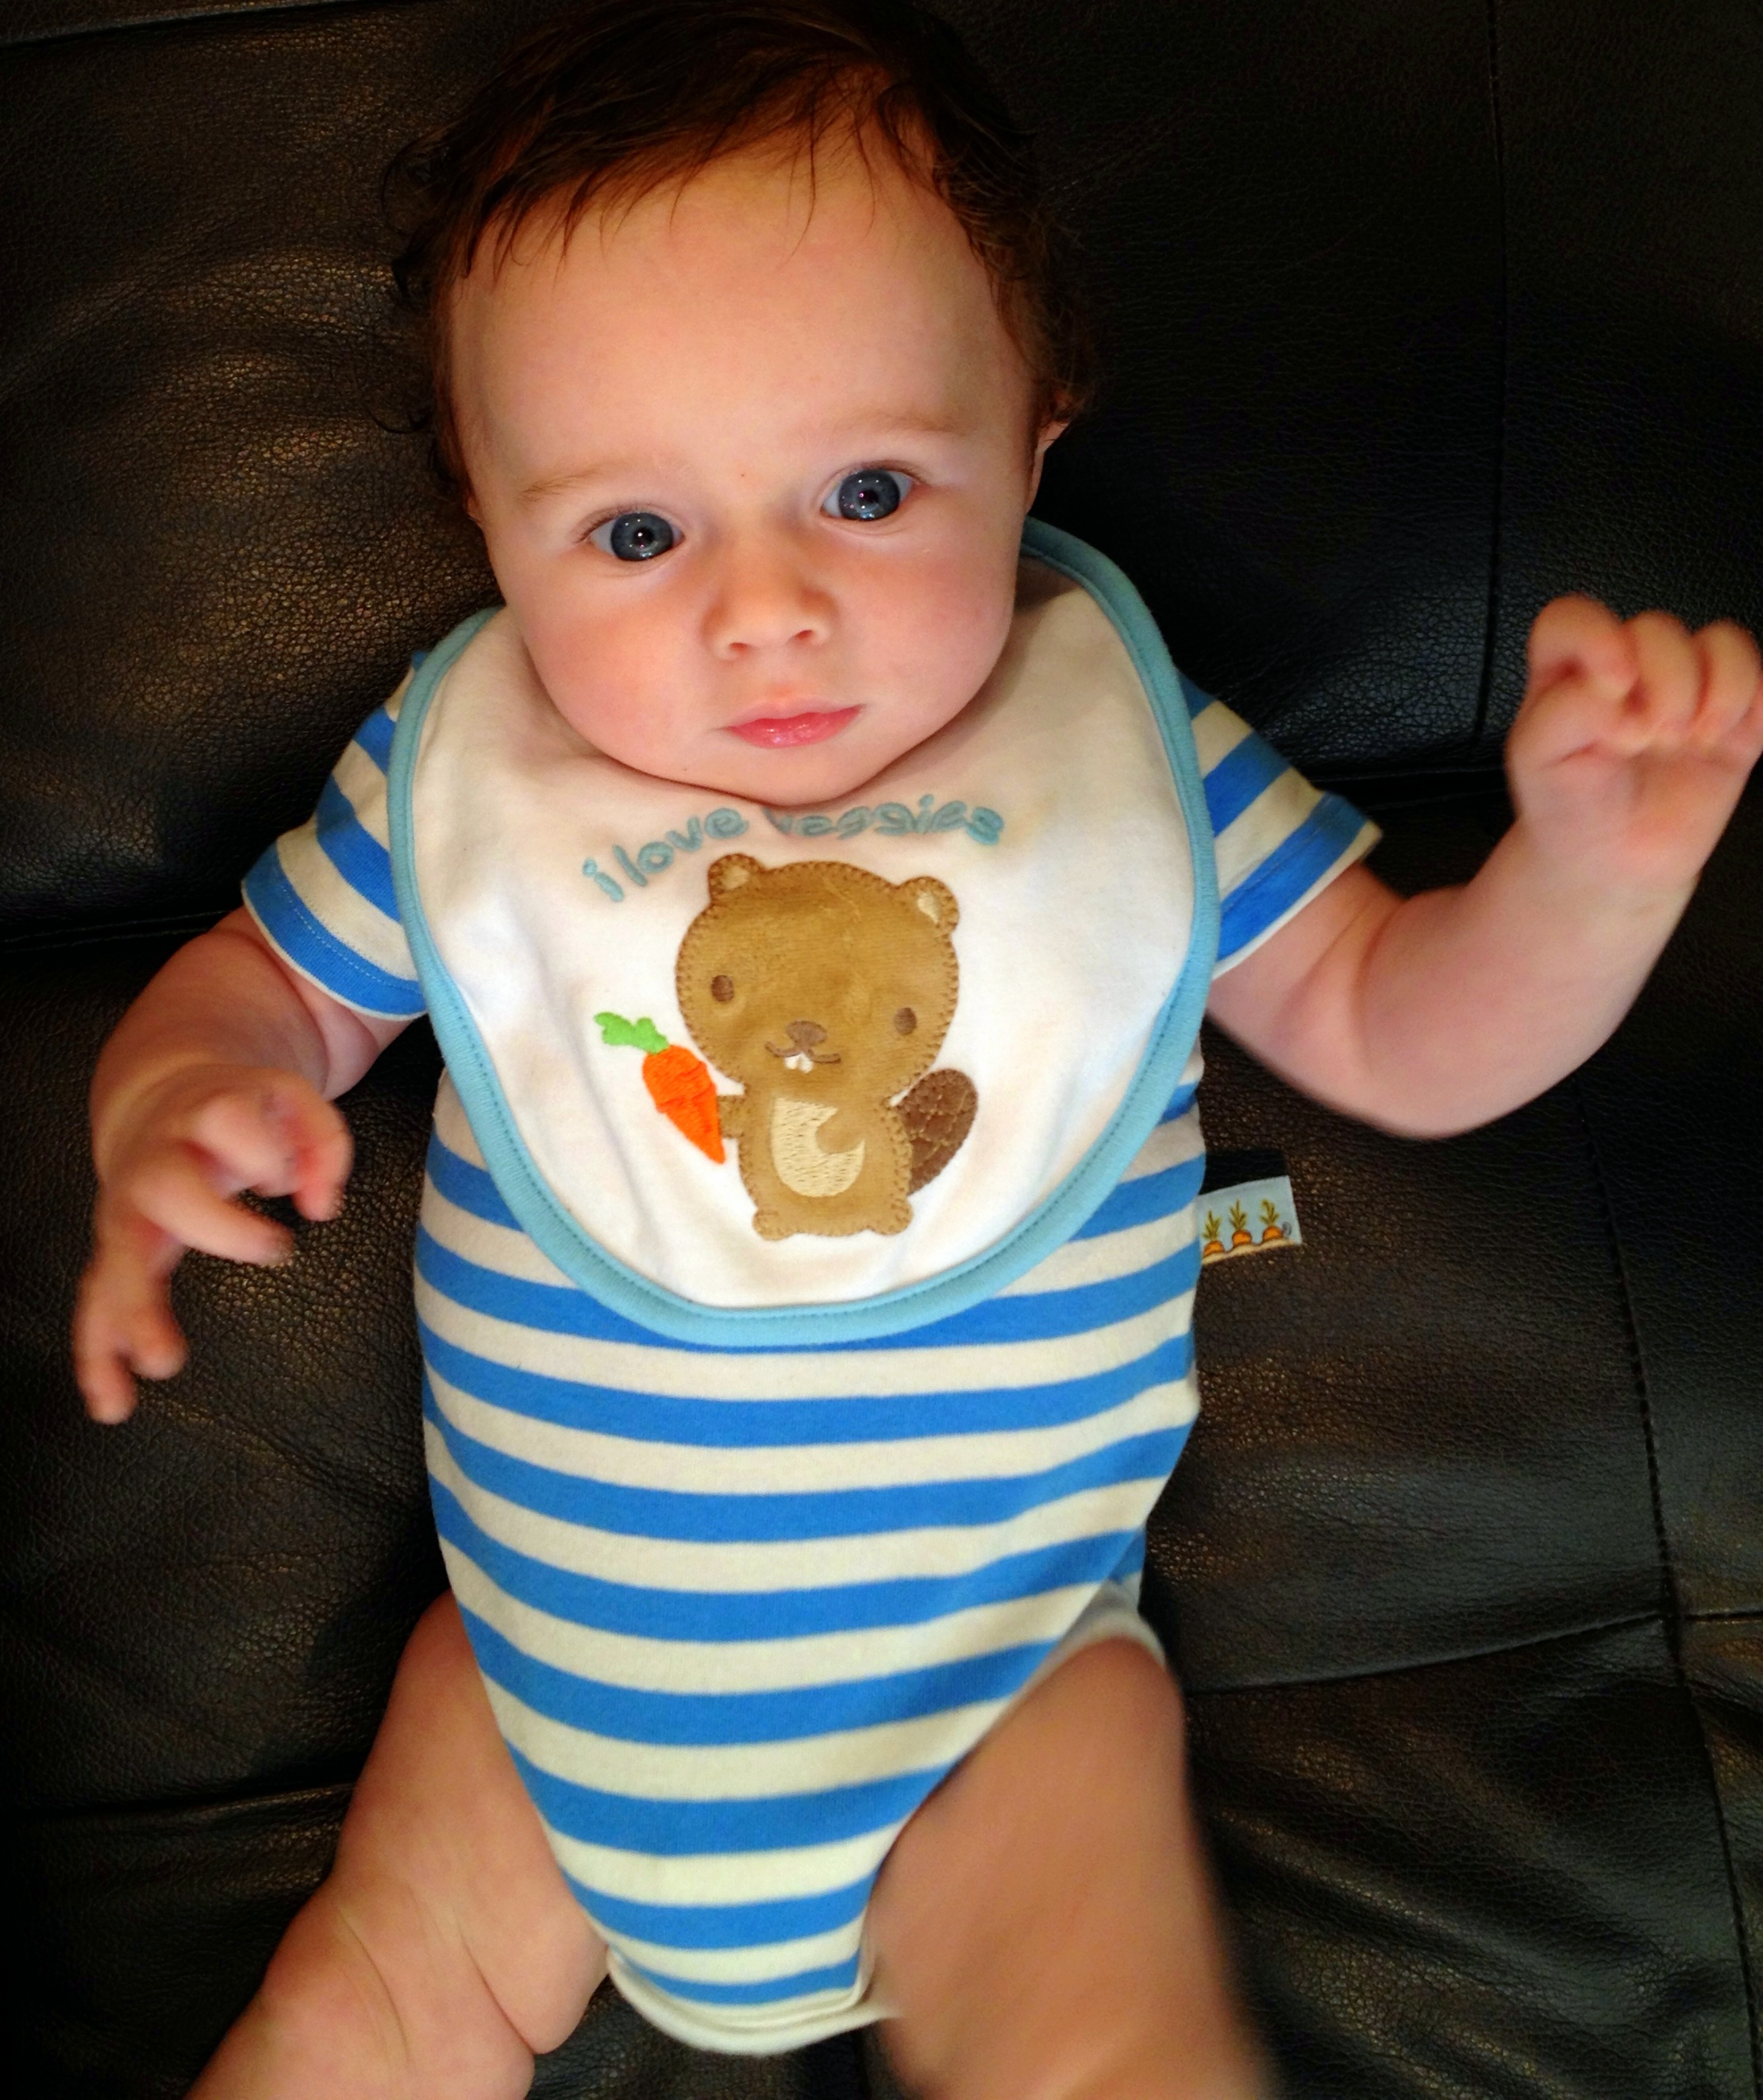
One of our cute velcro bibs. Bibs: Consider using bibs with Velcro rather than snaps because Velcro produces less direct strain to your thumb joints. Once baby is big enough to rip off the velcro bib, I liked the Zippy bandana bibs.
- Additional tips: I would recommend minimizing the total amount of clothing changes you attempt/do in a day. Does your child really understand or care about the concept of “daytime” clothes versus “pajamas?” Unless there is a temperature, cleanliness or safety related reason for them to wear a separate outfit, I avoid changing just for the sake of it being a certain time of day.

The exception is safety related to sleep: as mentioned earlier, it is not recommended for babies to sleep in hats, hoodies or other loose clothing, for the same reason it’s not recommended to sleep with blankets – there’s a risk of entrapment and thus suffocation. My overall recommendation is to conserve your energy and joint expenditure and minimize clothing changes when possible, as long as that is safe for baby!
Diapering & Changing stations
Since you will be changing over ten diapers a day for a number of weeks, it’s good to consider 1) how easy the diaper is to put on and take off, and 2) and the ergonomics of where and how you will be changing them.
1) Diaper Characteristics:
Your main options are cloth diapers versus disposable. Cloth diapers come with two closure options: snap and Velcro. This post provides a comprehensive overview of the two options, and it states that Velcro is reported to be the easiest on the joints. However, velcro is reported to be less durable than snap closures.

Most disposable diapers have tape-style closures, and most new parents end up trying a few brands to see what is easiest for them. I found that Pampers and Huggies were similarly easy to close, but the e Honest Company brand required a little more force/strain on the fingers than Pampers or Huggies.
2) Set-up of changing area & body mechanics
Think about the ergonomics of your changing area(s). Your main options are: buy a special diaper change table, use the changing feature on a portable crib such as the Pack ‘N Play, and/or use a travel changing pad on whatever surface is nearest you (such as a counter, couch or floor).
This article provides a nice overview of how to set up a changing table, and I will echo their suggestion that you make sure all your important items are nearby, so you can minimize the amount of bending, carrying and lifting you have to do.
3) Location of changing area:
As mentioned in my previous post on caring for the caregiver in the early days, consider having multiple diaper changing areas so that one is convenient to you. This allows you to save energy and minimizes the distance you have to carry the baby; little changes can add up quickly, especially if you are experiencing pain and inflammation.
Feeding related items
Yes, babies mostly “eat, sleep and poop” in the early days, so we’re covering these items first! I will focus on areas that are relevant to protecting tender joints and preventing repetitive stress injuries.
1) Body mechanics:

Try to sit in positions that result in the least amount of stress/strain on your body. It might sound obvious, but getting the hang of feeding usually requires a lot of focus on the baby and it’s so easy to forget to protect yourself. This article provides a fabulous and comprehensive set of instructions for the ergonomics of feeding and includes some really great pictures, so I encourage you to check it out.
Being aware of proper body mechanics while feeding is very important because you will typically be feeding at least 8 times a day during the first 3 months, usually down to 5-6 by 4-5 months. Most people use pillows such as the Boppy or My Breast Friend, as the pillows support the baby’s body weight and reduce shoulder strain. Also consider your wrist position and try to avoid extreme or awkward angles and try to maintain a nice, symmetrical upright posture.
2) Breastfeeding specific items:

- Clothing items: I found that nursing tanks required too many weird/awkward wrist and finger positions to get them on and off; I found that simple robes were much easier. If you do need to use special nursing bras, be sure to test them out beforehand to make sure they are as easy to get on and off as possible.
- Breast pumping: It really helps to get a bra that allows you to be “hands free” to minimize stress on fingers and wrists. As a bonus, most of these bras zip up the front, which is easier on the shoulder joints than your standard bra!
3) Bottle feeding:
Your decisions around what bottle type to choose will likely be affected by your baby’s specific preference in addition to what is easiest on your joints. Most people have to try a lot of different brands before finding a good fit, so be patient during this process! Think about the following as you select a bottle type or brand:
-
-
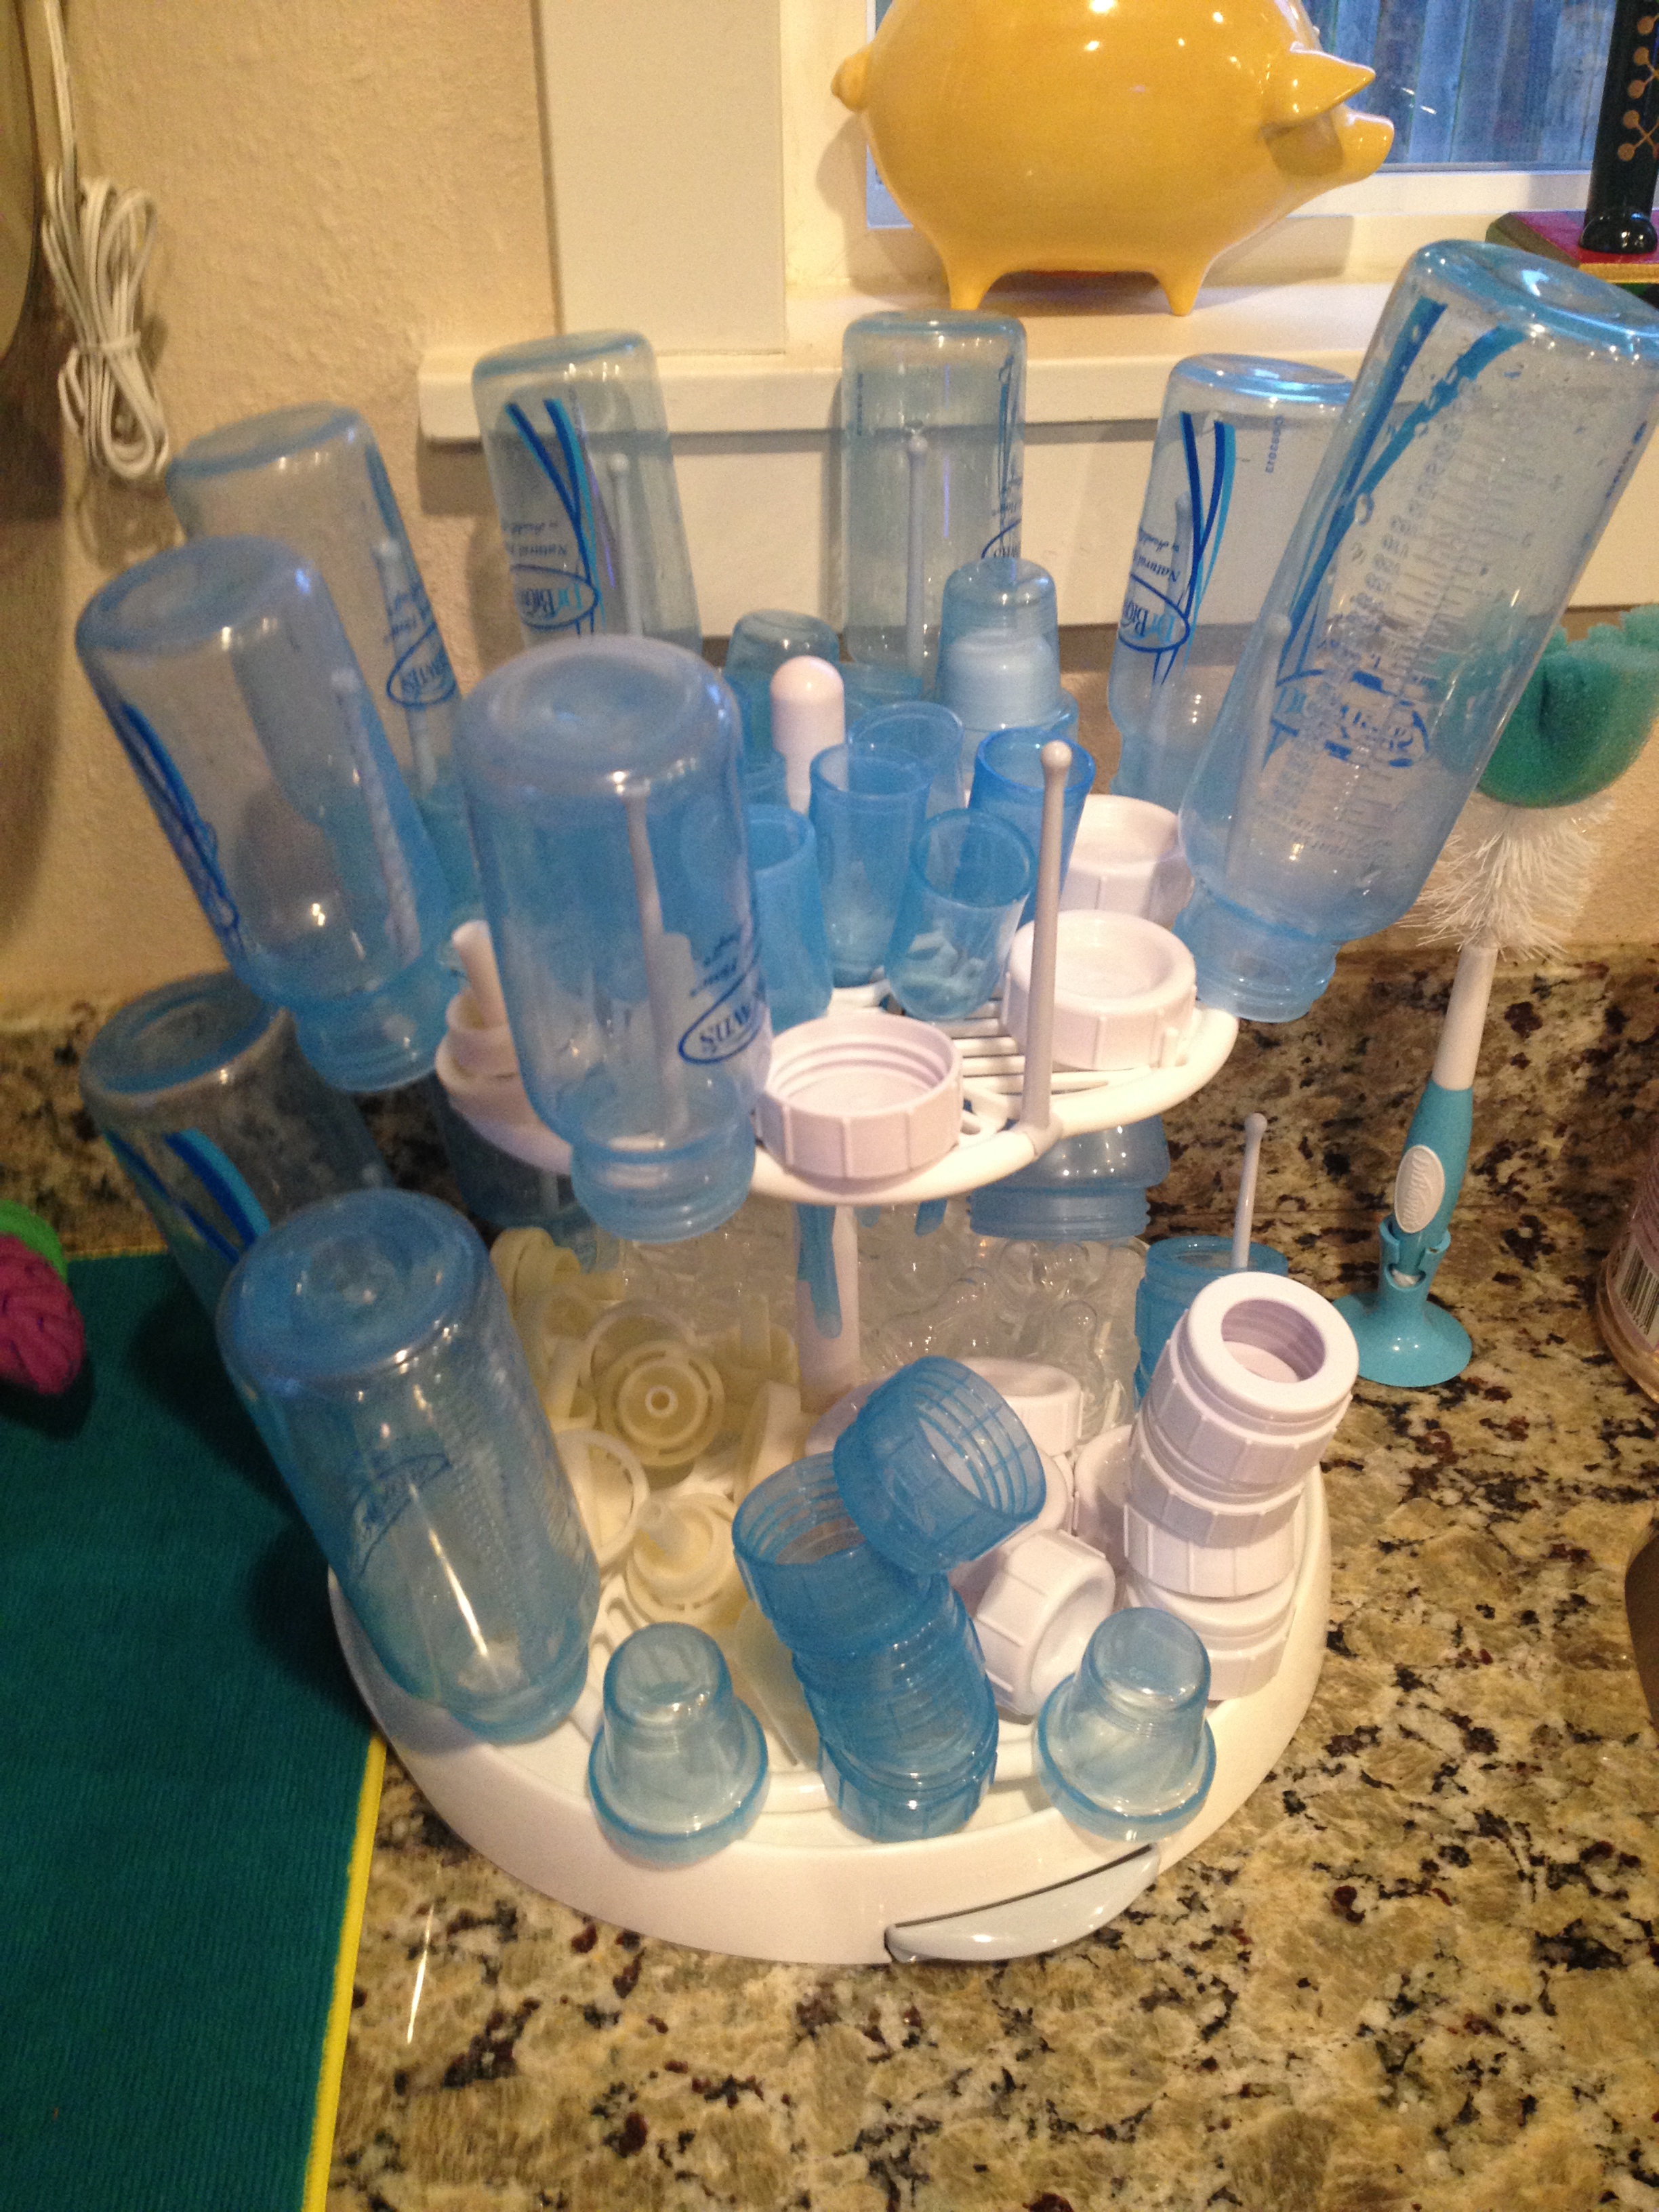
Bottle parts everywhere! How many little parts are there, and how easy are the parts to put together/take off? These two are related, as you can probably deal with a brand with lots of little parts as long as they are easy to put together/take apart. I used Dr. Brown’s bottles. Most of the parts were easy, with the exception of the vent tube and vent insert.
-

-
- How will you clean the bottle parts? Since most bottles have lots of little parts, cleaning them can be a big job. I found the medical advice on how to wash/sterilize bottles to be confusing, and I encourage you to ask your pediatrician or nurse if you have questions. Your general options are to wash by hand or in the dishwasher, the latter of which is obviously easier on the joints! To sterilize parts, you can boil the parts or purchase a microwave steam bag, both of which involve minimal strain to the hand joints.
-
- Ready to feed formula bottle option: If you are formula feeding it is recommended to use “ready to feed” bottles for the early days (again, precisely how that is defined varies depending on whom you ask). These bottles are by far the easiest on your joints as they come pre-mixed and assembled, however they are also the most expensive by a very wide margin as compared to powdered or liquid formula.
Movement items: Baby Carriers, Strollers, Car Seats
1) Baby carriers
Baby carriers are a great way to minimize stress on the hand joints…once you have them on! When designed and fitted correctly, carriers can keep the baby close to the center of your body so the baby’s weight is distributed and supported by your large joints rather than your small wrist/hand joints when you are carrying them.
Most major cities have “Baby wearing” groups where volunteers help you try on different carriers. I think other people with joint conditions would benefit from considering the following, when selecting a baby carrier:
How easy it is to take on and off? Specific items to consider include:
- Closures and adjustments: Does the carrier require lots of pinching or pulling in order to secure or tighten it? If you have thumb pain (as I do), this is particularly important as many of the closures require pinching with the thumb joint. Are the straps easy to tighten and loosen? Are they located on both sides or just one side?
For example, I liked that the Pikkolo has strap adjustment areas on the left and right side of the bottom part of the carrier (as opposed to the Ergo, which has just one), so that I could choose to tighten/loosen the side with the hand that is experiencing the least pain in the moment. A general principle of joint protection which I alluded to earlier is that you want to spread the force across multiple joints rather than requiring one joint to absorb all the force for an action (and on a related note, for the kind of arthritis I have that affects the small hand joints most, you want the force to be absorbed by bigger joints when possible).
- Resistance the material provides as you put it on or have to put baby in it:
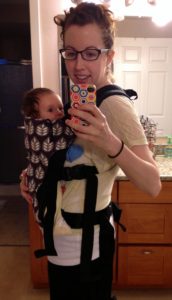
- Soft carriers are really comfortable for the baby, but some of them are easier to take on and put off than others. I found the Moby to be pretty easy!
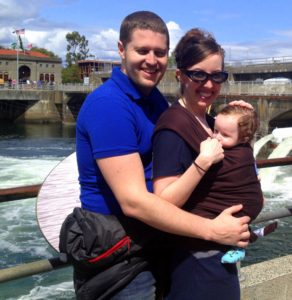
-
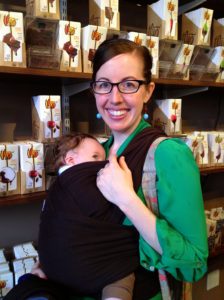
Moby is nice and soft. How does this product support the baby’s weight so that you can avoid excessive stress on your back or other areas?
- In my personal experience, carriers like the Ergo that required closures seemed to distribute the weight of a heavier baby a lot better than soft carriers. I think that this particular aspect depends a lot on the individual person’s body mechanics, size and areas of pain.
- Versatility of wearer: can this item be used easily by a partner/friend so they can help carry the load of the baby?
- General advice: It’s nice to have a few different carriers or using one carrier that has options for a variety of “holds” so that you don’t cause repetitive stress on one area of your body.
2) Car seats
Resources like The Car Seat Lady were indispensable for me as I made decisions around my child’s car seat. The main items relevant to protecting the caregiver’s joints are as follows: seat weight, buckles/closures/straps (how easy are they to secure and tighten/loosen), seat design (infant versus convertible), and how easy it is to put in and take out of the car.
-

My husband holds the Chicco infant car seat. How heavy is the car seat? Keep in mind that when you have an infant, you are usually taking the baby in and out of the car by carrying the car seat, whereas once the child is in a convertible or booster seat the weight won’t matter as much as long as you aren’t typically going to have to uninstall the seat and move it to another car. The Chicco Key Fit 30 infant seat, which we used, is one of the lightest yet safest options. I carried it by looping it through my elbow, which avoided my hand joints; I also kept my elbow close to my body when I carried it, which helped protect my hands as well.
- How easy it is to put the car seat into and out of the car? Remember to follow basic joint protection strategies and carry the car seat close to your body with your larger joints as much as possible, to minimize stress on your fingers.
-
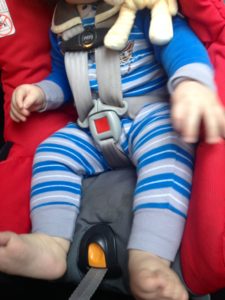
Car seat buckle. How easy is it to tighten/loosen harness/straps? This is super important because you have to tighten the straps each time you put the child into our out of the car. In most car seats, you tighten the harness by pulling up on a strap at the bottom, which can definitely be hard on the hand joints.
- How easy are the buckles to clasp and unclasp? Buckles have to be strong enough to prevent the child from unsafely exiting the car seat, which is good for child safety but often hard on parental joints. I recommend that you try out the buckles and closures in person before purchasing a seat.
3) Strollers
I found it important to consider:
- How easy is the stroller to fold and unfold? We used a Snap ‘N Go in the early days.
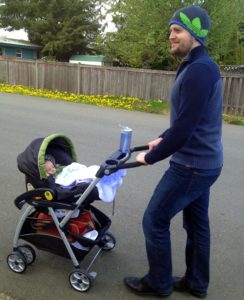
Gabe rocks the lightweight Snap ‘N Go. I loved my BOB Revolution for working out and for rough terrain. We enjoyed our City Mini Baby Jogger for shorter trips. They both folded super easily (video for City Mini here, and BOB Revloution here), but the City Mini was much lighter, so it was easier to get into the car.
- How easy it is to put the baby in and out of safely? This topic is very similar to the section above for car seats, so I recommend that you use those same principles. Strollers are a bit easier to move around, however, because you have more freedom of movement (as opposed to a car where you are working within the confines of a small space).
- How easy is it to push over the types of terrain you expect to traverse?
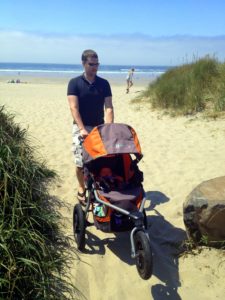
The BOB Revolution is great for uneven surfaces. For example, our BOB stroller was heavy to lift and put into and out of the car, but it was super easy to push over rough terrain like sand. The Snap ‘N Go was extremely light and easy to fold/unfold and put into and out of the car, but it was super difficult to maneuver over even small cracks in the pavement. So there are usually trade-offs involved in this area!
- General recommendation: Remember to use good mechanics (“lift with the legs, not the arms!” and keep the stroller close to your body). Think about “activity conservation” and try to minimize the amount of times you have to take the stroller into and out of places; for example, I tried to really consolidate my errands and social activities so I’m not constantly battling the stroller and car seat.
Cribs, bassinets and other sleep items
The baby will be sleeping a lot in the early days, and it is advised to practice good body mechanics as you lift baby into and out of the crib in order to avoid excess stress on your body. In the early days I found it useful to utilize portable cribs, however once our baby could roll over and sit up independently, options became more limited and we ended up using the crib almost exclusively (although he does still take some naps on me in the Ergo baby carrier, which is like a wonderful, heavy, warm hug!). I recommend that you consider the following:
For immobile cribs:

Does it have a higher up option for infants? This is really helpful for the early days to prevent excessive lifting/bending.
Since “drop down cribs” have been ruled unsafe for babies, you will have to do some level of bending in order to get the baby in and out, but the higher up infant setting minimizes the amount of bending down you have to do. Most cribs marketed as “4 in 1” will have that option.
For portable cribs:

There are 3 elements to consider for your joint protection when it comes to portable cribs: how easy are they to fold up and take down, how easy are they to transport, and how easy are they to place the child into and out of?
Some of the folding ones such as the Rock ‘N Play portable bassinet place the baby higher up than others and thus require less bending when you put them in and lift them out, which is a nice bonus.
There are also semi-portable options such as the “Arm’s Reach Co-Sleeper” which can be really helpful as it attaches to your bed so that you theoretically can just roll over and attend to the baby’s needs rather than having to get up and then bend down and pick up the baby, yet it keeps baby away from potentially unsafe hazards such as soft bedding and blankets.
Final recommendation: Seek help if you are in pain

If you feel a degree of pain that prevents you from performing basic or essential tasks to care for your child, seek help from a medical professional! On a few parenting message boards/Facebook groups, I’ve heard stories from mothers who have waited too long to get help because they were embarrassed or felt silly for feeling pain over something “so basic” as caring for a child. Please know that caring for a child is a very physical job, and medical professionals can provide many options for minimizing current pain and prevent future pain.
For example, I have a total of 4 splints to address wrist and thumb pain from caring for Charlie and my job as a pediatric occupational therapist; they hold my wrist and thumbs in place to help as I pick him up and put him down. The harder splints really help support Charlie’s weight and I’m so glad I was proactive in getting a referral to a Certified Hand Therapist before the pain progressed further. Splinting can help support your joints and minimize additional pain and inflammation from performing daily activities.
Conclusion
In conclusion, I simply recommend that when selecting baby items, you consider the stress the items may cause on your body. Preparing for a baby can be very overwhelming, and it’s easy to focus so much on the baby that you forget to consider what might be best or most appropriate for the caregiver. Long term, the baby will be best served by a caregiver who can use their body to the maximum of it’s potential, so you’re doing both your baby and yourself a favor by protecting your joints!


On a final note, while it’s super fun to discuss and list what products to buy, please keep in mind that the way in which you interact with the items will likely play the largest role in how you are able to minimize joint pain and prevent repetitive stress injuries.
There are many more items I did not cover, for fear this post would become even longer and more unwieldy. These items include: bathing related items, toys, and older baby feeding items such as high chairs, spoons, cups, etc. However, as you’ve seen, the same principles apply across a wide variety of items.
Please let me know if you have any additional thoughts/recommendations in the comments section, especially those with joint pain (either chronic or caused by repetitive stress during child rearing)! Do you have any additional tips/suggestions? Let me know in the comments section!
*The information contained on this blog should not be used as a substitute for the medical care and advice of your doctor and your child’s pediatrician.
11 Comments
Heidi
Thank you for your research and information. My hands are quite deformed and we are expecting our first. I have been freaking out about all the things I won’t be able to do and I haven’t wanted to venture out to look for products…. Knowing they have to be out there but not knowing where to start. It is still super overwhelming, so I didn’t check the links yet, but as time goes on and I get more excited, I will look here again. Thanks!
Cheryl Crow
Hi Heidi, best of luck with your new little one! Have you heard of the group Mamas Facing Forward? It’s a Facebook group of all moms with chronic illnesses, I highly recommend joining it to get support and share ideas! My best advice is to just take things one day at a time and accept help if it’s offered. Let me know if you have any specific questions!
Pingback:
NiekaNaik
Thank you so much for giving me hope with the consideration of having a baby. I have had JRA since I was 16 an am now 23 and engaged. Can’t wait to share this helpful information with my fiance. It’s great to know the perks and being able to continue a semi-normal life. Your experience is inspiring!
allgrownupwithjra
Cheryl,
This is an amazing resource!! As a fellow pediatric occupational therapist and a a future mom with JRA (one day!), this is fabulous! Would you mind if I shared it on my own blog as a resource? I recently started my own blog about being a young adult with JRA with a little bit of occupational therapy posts thrown in there! I look forward to reading more about your story and learning from your resources and experiences.
Stefanie
http://www.allgrownupwithJRA.blogspot.com
Cheryl Crow
Wow, thank you SO much for commenting, Stefanie – I love it when my worlds collide, and it’s wonderful to meet another pediatric OT with a form of autoimmune arthritis (although I wish you didn’t have it, sorry!). PLEASE share my post and any others that you think might be helpful on your blog, I would be honored! I look forward to staying in touch with you as well! – Cheryl
Cheryl Crow
PS. Are you going to AOTA in Nashville? Let me know!
Stefanie
Hey Cheryl,
I am unfortunately not! I have too much going on this year. I have a few coworkers who are though and I’m jealous of some of the sessions they’ve been reading about. It sounds like it should be great! However, If you’re ever in the New England area, let me know!
What setting do you work in again?
Stefanie
Cheryl Crow
I LOVE going to AOTA, have gone every year except last year when I was just a couple weeks postpartum, but I totally understand it’s hard to fit it in! I love the New England area, and let me know if you’re ever in the Seattle area! I work at a private clinic with kids 3-13 who have a range of developmental disabilities and/or fine motor/handwriting difficulties, it’s called Stepping Stones and you can read more here: http://www.steppingstones-ot.com/ Where do you work? So glad to have “met” you virtually!
thecarseatlady
Thanks for the recommendation to check out our website! What a great piece you have written here. For those who are struggling to undo the crotch buckle on the child’s car seat, you may want to try the following: 1. unbuckle the crotch buckle BEFORE you loosen the harness straps – this way the tension in the harness will help you unbuckle (put your hand behind the crotch buckle, stack your thumbs on top of each other on the red button, push the button in and pull downwards to pull the silver tongues out of the buckled. 2. Try the Buckle Bopper – http://www.bucklebopper.com/Home.html
Another lightweight infant seat that we love is the Cybex Aton2 – which we find is easier to get out of the base than the Chicco as you don’t have to lift up as much – and you don’t have to squeeze anything on the back of the carrier (the release is on the base).
Cheryl Crow
Thank you SO much, Car Seat Lady – I have been implementing your suggestion of unbuckling when the straps are still tight and it’s made a HUGE difference! I also purchased a Buckle Bopper and am excited to try it out. Thanks for the tip about the Cybex Anton2! I ended up getting the Britax Click Tight convertible seat (I can’t even remember which model – I think the Boulevard?) and it’s definitely a lot harder than the infant seat but it’s fairly easy to get it in and out of different cars, which is really nice! Thanks again!